Sunday, September 22, 2013

Concord Grape Jam

Can you make a peanut butter and jelly sandwich without grape jelly or jam?  Sure, other flavors like strawberry are okay, but nothing compares to grape.  It just works best.  At least that's the consensus at my house. 


That being said, when you start to make your own jellies and jams, it is difficult to make a sandwich (or anything else using jam, for that matter) with anything other than homemade.  I had been putting off making grape jelly because I just don't like the process of making jelly (too time consuming and laborious for me), but that also meant I was constantly having to consider purchasing grape jelly in the supermarket.  


Grape pulp with seeds
I usually didn't which led to many inferior sandwiches.  That is, until I decided to try grape jam instead.  If you've never tried grape jam, you must.  Like right away.  It is so easy, sets beautifully, and has a great consistency.  Jelly-like but with a little more texture, it does not have chunks of grape as peach would have chunks. Instead the grapes are pressed through a sieve to achieve the proper consistency.  

Grape skins ready to be ground in food processor
Grape pulp being pushed through a chinois to remove seeds
Since making this jam, it is a little scary to admit that we have already eaten two jars.  This jam can also be used in any number of desserts where jam would be appropriate.  Thumbprint cookies, jam filled muffins, oatmeal jam bars (I will try to post a recipe for these soon)...the list could go on and on.

Concord Grape Jam- makes approximately 9 half-pints

4 pounds Concord grapes (other varieties will work also)
1 cup water
7 cups granulated sugar
1 box powdered pectin (1.75 oz)

Prepare canner, jars, and lids.  Sort, wash, and remove stems from four pounds of grapes.  

Squeeze the skins off the grapes, and separate skins and pulp into separate bowls.  

Place pulp (will still contain seeds at this point) in a medium pot with 1 cup water.  Bring the mixture to a boil, cover, and simmer 5 minutes.  Press the pulp mixture through a fine mesh sieve or chinois (conical strainer on a stand with a pestle) to separate the pulp from the seeds and to break the pulp down.  Set aside.  

In a food processor, puree all or part of the grape skins.  The amount you use is up to you and the color you hope to achieve (I used about 2 cups skins measured before pureeing).  Press the pureed skins through the sieve into the prepared pulp.  

Place the prepared grape mixture in a large, heavy bottomed pot.  Add the pectin and stir to combine.  Bring the mixture to a boil.  Once boiling, quickly add the sugar and stir to combine.  Stirring constantly, bring the mixture to a full rolling boil.  Boil for 1 minute.  

Remove the jam from the heat.  Using a clean spoon, skim the foam from the top of the jam.  Ladle the jam into prepared jars leaving 1/4 inch headspace.  Wipe jar rims and top each with a prepared lid and ring.  Process jars 5 minutes in a boiling water bath adjusting for altitude as needed (increase processing time 1 minute for each 1000 feet).  Remove jars from the canner to a clean towel to cool completely before checking seals, labeling, and storing. 

Printable Version

Sunday, September 15, 2013

Apple Pie in a Jar

I love fall!  I say this every year.  Fall is the best season by far.  With its deep warm colors, comforting aromas, and cool crisp days, there is nothing like it.  Though it is technically not fall yet, to me fall arrives with the apples.  Each year my husband and I watch the websites of apple orchards in the mountains, and as soon as we know they are picking the varieties we want, we head up there.  Our first trip always yields an abundance of Honeycrisp apples which are perfectly sweet and tangy with a great crunch, but I also pick up apples for making goodies.  


We enjoy having canned pie filling on hand, so I decided to make some apple this year.  I picked up a peck of gala apples which hold their shape nicely when baked.  With some of those apples, I made four quarts of pie filling just to test the recipe.  We loved it and will definitely be making more as soon as we can get our hands on more baking apples. 

The filling is thick, gooey, and spicy and uses Clear Jel to set.  The filling is a little frustrating to get into the jars.  I ladled it in and then used a spoon to gently fill in the holes as I went.  Try to remove as many air bubbles as possible, but inevitably some will probably remain.  Don't worry about a few.  

If you have never purchased Clear Jel, you must purchase it online.  Supermarkets do not carry it.  I get mine from Kitchen Krafts, but you can also purchase it from Amazon and other sources.  The great thing about it once you purchase a bag is that it can be used when making pies from scratch as well as in other places where thickeners are needed like sauces, gravies, etc.  It is worth the purchase.  Also, this is one of those times where your jar really matters.  I found that the wide mouth jars were much easier to pack than the regular mouth.  If regular is all you have that is fine though.  It will all work the same in the end.  

The recipe below makes 7 quarts.  If you wish to make less, the calculations per jar can be found at NCHFP.  This recipe comes from that site.  I did use the recommendations from another blog (Hickery Holler Farm) to use some white sugar and some brown, and I also used apple cider rather than apple juice because that was what I had on hand.  I am adding those modifications into the recipe below.  Even though it is safe alter the type of sugar or change the quantities or types of spices, do not alter the Clear Jel or lemon juice. 

Canned Apple Pie Filling- makes 7 quarts


6 quarts good quality baking apples, peeled and sliced 1/2 inch wide
4 cups white sugar
1 1/2 cups packed brown sugar
1 1/2 cups Clear Jel
1 Tablespoon cinnamon
1 teaspoon nutmeg
2 1/2 cups water
5 cups apple cider (or juice)
3/4 cup bottled lemon juice

Prepare your canner.  Sterilize and warm jars, lids, and rings.  As you peel and slice apples, keep them submerged in cool water with added lemon juice or ascorbic acid to prevent browning.  

Bring a large pot of water to a boil.  Boil the apple slices for 1 minute in batches.  Drain fruit and set aside. 

In a large pot, combine white sugar, brown sugar, Clear Jel, spices, water, and apple cider.  Stir and cook on medium high heat until the mixture thickens and begins to bubble.  Add lemon juice and boil 1 minute, stirring constantly. Fold in the drained apple slices, and immediately fill jars with mixture leaving 1 inch headspace.  It is easiest to fill jars a little at a time so that you can use a utensil to gently push the filling into the jars to remove air bubbles as you go.  Once jars are filled, use a bubble remover to remove any remaining air bubbles and to fill any pockets created in the jars.  

Wipe the rims of the jars.  Top each with a lid and ring.  Process jars in a boiling water bath for 25 minutes (for pints or quarts).  Remember to adjust accordingly if you live above 1,000 feet.  Remove jars from the canner and allow to cool completely before checking seals, labeling, and storing. 


Sunday, September 8, 2013

Grape Juice Concentrate

I recently found myself with more Concord grapes than I knew what to do with.  I had purchased them to make grape jam (more on that later) because apparently, according to my household, a peanut butter and jelly sandwich just isn't the same with strawberry jam.  I believe this to be true also, and since I had been eating a lot of peanut butter and jelly at work (due to my lack of motivation to pack anything else), I figured grape jam would be an important addition to the pantry.  


Finished juice with a jar of concentrate in the background.  The concentrated juice darkens and becomes more flavorful over the course of about a week after canning.

Anyway, I bought too many grapes.  They were inexpensive, and since I never really have access to local grapes, I got a little carried away.  I wanted to find something easy and quick to do with the excess, and grape juice sounded like a good idea, but I really didn't want to go through the lengthy process of cooking the grapes, straining them, refrigerating them, filtering them, etc.  So, I looked around until I came across a great method for making grape juice using raw packed fresh grapes, sugar, and water.  


This method is really nothing more than canning whole grapes in a sugar syrup with the exception that you do not fill the entire jar with grapes and you add the sugar and water separately.  You can alter the amount of sugar you use, but make sure to use enough to counter the tartness of the grapes.  


You fill the jars with fresh, raw grapes, pour desired amount of sugar into the jar, and cover with boiling water.  As the jars are processed in a boiling water bath, the heat and pressure cause the grapes to split open and flavor the water.  When removed from the canner, this process will have started, but the longer the jars sit, the darker the juice gets.  If you allow it to sit for about a week, you will have a very flavorful concentrated liquid which you can then strain through cheesecloth.  Just add fresh water to this concentrate, and you have a very tasty juice.  The finished juice is sweet (but not too sweet), slightly tangy, and very refreshing.  If you prefer a weaker juice (something more akin to flavored water) simply add more water when mixing.  Either way it is delicious.   

Juice just after canning.  Notice that it is not dark yet and the sugar has not dissolved. 


A few important notes...
  • I chose to double the quantity of grapes and sugar to create a concentrate so that every time I open a quart of grapes, I can actually get around 2 quarts of juice.  I also wanted to minimize the number of quart jars I had to store.  If you prefer to make a juice that simply needs to be strained before using, use only half the grapes and sugar.  At that point, simply strain and serve (no additional water is needed). 
  • Make sure you keep cheesecloth or a fine mesh strainer on hand to remove seeds and skins from your juice, and make sure you clean your grapes exceptionally well before adding them to your jars in the beginning.  There can sometimes be debris on the grapes that you don't easily notice while washing, and this can result in pieces of debris in your juice before straining.  Just wash your grapes really well.   
  • Just after processing your jars, you will notice a layer of sugar on the bottom of each.  This will dissolve over the course of the next week.  Just shake or invert your jars gently several times during the days after processing to help the sugar dissolve quicker.  
  • I read somewhere (I can't remember where) that if you put a knife or metal utensil gently inside each jar as you fill it with hot water that the utensil will absorb a lot of the heat helping prevent the jar from breaking.  Even though you should be using hot jars when packing and filling, it's not a bad idea to give this a shot anyway if you are worried about jars cracking from temperature changes.  Could be true, could be an old wives' tale.  

This recipe makes 1 quart of juice concentrate.  Just increase the quantities as needed for the number of quarts you wish to make.  The idea/method for making this juice came from Thy Hand Hath Provided.  The method is essentially the same as the method for canning whole grapes from National Center for Home Food Preservation.  The only difference is that you are not completely packing your jars with grapes, and you are using the juice rather than the grapes in the finished product.  

 
Grape Juice Concentrate-  makes 1 qt of concentrate/2 qts finished juice

You will need 4-5 pounds (approximately 14 cups whole grapes) to make a canner load of 7 quarts of concentrate.

2 cups whole grapes, washed well with stems removed
2/3 cup sugar 
2 pints boiling water

Sterilize and prepare quart jars for canning.  Soak lids in boiling water.  In each sterilized jar, place 2 cups whole grapes.  Cover with 2/3 cup sugar.  Add boiling water to cover leaving 1 inch headspace.  Wipe the rim of each jar before topping with a sterilized lids and rings.  Process each jar in a boiling water bath for 20 minutes.  Remove jars and allow to cool completely before checking seals.  

To use the Concentrate:  Strain the contents of 1 quart jar through cheesecloth or a fine mesh strainer (to remove seeds and skins) into a clean vessel.  Add 1 quart fresh water (you can add even more for a weaker juice).  Stir and serve chilled.    

Printable Version


Friday, August 30, 2013

Speckled Limas Beans

Have you ever ended up buying and going home with something you really shouldn't have?  I have...many times.   


The other day I was walking up to pay for my basket of produce at the farmers market, not intending to preserve anything that week, when a basket of speckled lima beans caught my eye.  Having never put up lima beans and noticing that they had a pretty low price tag, I snapped up a half bushel, not really knowing how I would use them or if we would enjoy them this winter.  I just couldn't help myself.  I think it had something to do with the fact that they were purple and polka-dotty. 


At first I regretted buying them because they meant so much work.  Shelling, washing, sorting, and blanching take time, you know?  But the more I think about it, the more I wonder why I have never frozen limas before, and to be honest, they really weren't that much trouble to put up in the first place.  Now, I'm excited to use them in soups throughout the winter, and I imagine I will be able to cook them the same way I do field peas.


So, this year we'll be eating frozen limas, and we'll see, come inventory time, how much we really enjoyed them.  You never know, it may just start a new tradition.  

By the way, that same shopping trip also ended up with me buying another 25 pounds of Roma tomatoes, which I truly did regret and ended up crushing and canning just so I wouldn't have to think about them anymore.  I will use them, I'm sure, but that was just a case of my eyes being bigger than my canning stamina.  

Freezing Speckled Lima Beans- 1/2 bushel makes 6-7 quarts frozen beans

A half bushel (15 pounds unshelled limas) ended up giving me 6 1/2 quarts of frozen beans.  The speckled beans do lose some of their color and detail upon blanching, but they remain pretty none the less. They do require several rounds of washing to get them really clean and free of debris.  Do not skip this step.  Otherwise you will be eating dirt (yuck!).  

1/2 bushel unshelled lima beans
boiling water
ice bath

Shell the beans and wash them thoroughly.  Drain the beans and wash again as needed, until the beans are free of debris.  Place the beans, in batches, in a large pot of boiling water.  Blanch the beans for 3 minutes.  Remove the beans with a slotted spoon or mesh strainer, and place the beans in an ice bath to cool.  Once cooled completely, drain the beans and place in freezer bags leaving 1/2 inch headspace. Label and freeze for later use.     


Wednesday, August 21, 2013

Chicken Update

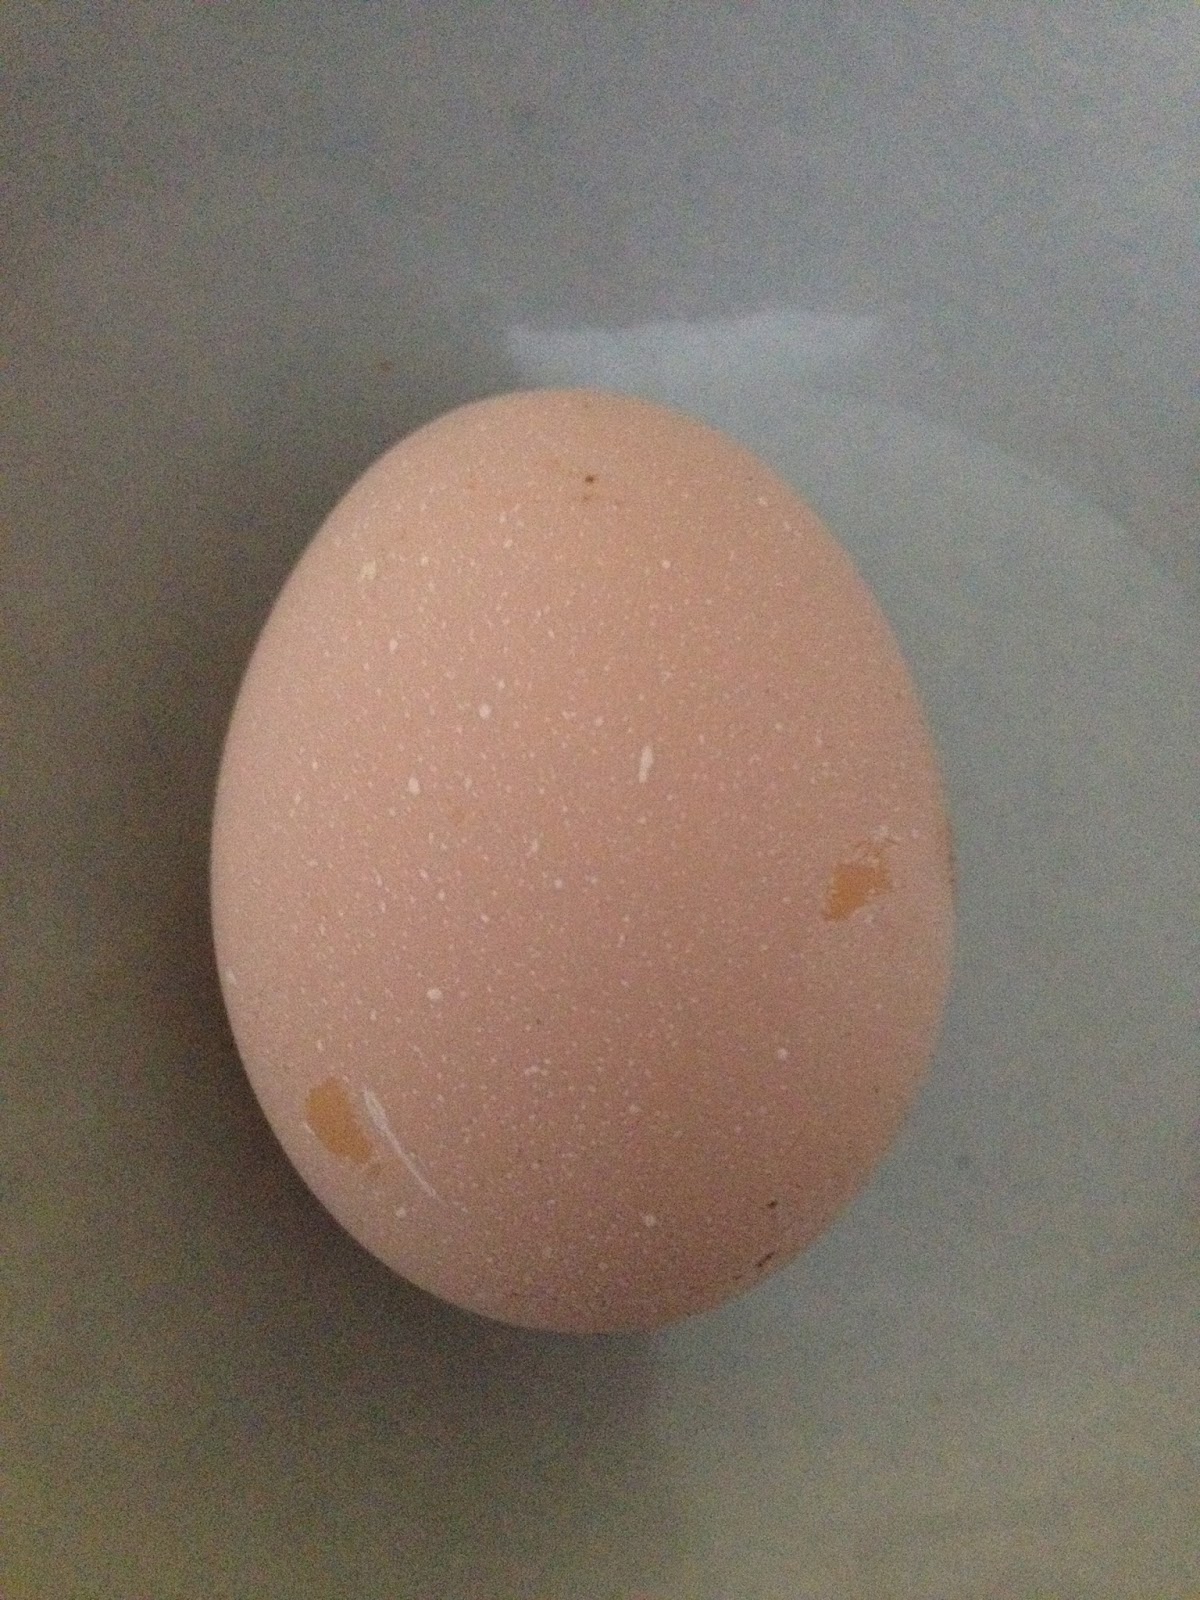
I didn't plan on posting anything tonight, but when I got home and checked on the chickens, guess what I found lying in the nesting box?

The first egg!!!!


A small but perfectly shaped pinkish brown egg lying right next to the wooden egg I had placed in the nesting box several weeks ago.  Now wasn't she just the smartest chicken to know exactly where to lay it?!


I was so excited.  I congratulated the brilliant girl on her accomplishment and took my new prize to the kitchen where I fried it with just a sprinkling of salt and pepper. 

 
The yolk was almost orange, and it was delicious.  We are now in business.  Can't wait for the next one!

Friday, August 16, 2013

Peach Crumb Galette

With peach season in full swing, here is a peach galette piled high with a yummy crumb and almond toppingThis is a perfect dessert for those who want the taste of a fresh peach pie and peach crisp all in one.  It is also easy to assemble with any pie crust you have on hand.  I used a butter and lard crust (I will post about the crust later), but an all butter crust or your favorite pie dough would work just as well here.  If possible, a homemade crust will be the best since it will be far flakier and more flavorful though.   


A couple of notes about this galette...
  • Make sure you bake it on a sheet tray with sides in case the filling gets all bubbly and oozey on you (as it certainly will to some extent).  
  • Make sure to pile the crumb topping high on the galette as it will bake down and become one with the filling.
  • That being said, you may have a little crumb topping left over.  If so, use it to top your favorite muffin or quick bread or keep in the fridge for a day or so until you need it for something else. 


Begin by rolling your pie dough into an approximate 10 or 11 inch circle.  Then place your prepared peaches in the middle of the circle leaving an inch or two on each side.  You will fold the sides up around the filling, pleating the dough as you go.  The dough will then get brushed with an egg wash and sprinkled with sugar. 


Next, spoon your crumb and almond topping into the center of the circle, covering the peaches, until it is piled high.  


Bake the galette on parchment paper, and allow it to cool for 20-30 minutes before serving.  This is important.  If you slice it too early, the juices will leak out and the galette will fall apart.  

Peach Crumb Galette- serves 6-8

Galette:
1 prepared pie crust, preferably homemade
4 ripe peaches, peeled and sliced
1 Tbsp all-purpose flour, plus more flour for rolling out pie dough
1/3 cup granulated sugar, plus 1 Tbsp for sprinkling on crust
1/4 tsp ground cinnamon
pinch of nutmeg
1 egg
1 tsp milk 

Crumb Topping: 
1/2 cup all-purpose flour
1/2 cup granulated sugar
1/4 cup sliced almonds
1/4 cup (1/2 stick) butter, softened
pinch salt
1/4 tsp cinnamon

Preheat oven to 350 degrees.  Line a baking sheet (one with sides) with parchment paper.  On a lightly floured surface, roll pastry dough into an approximate 11 inch circle (if it is a bit smaller, that is okay).  Place the pastry circle on the parchment paper and set aside.  

In a medium bowl, toss the sliced peaches with 1 tablespoon flour, 1/3 cup sugar, 1/4 teaspoon cinnamon, and a pinch of nutmeg. Place the coated peaches in the center of the pie circle, leaving a 1 to 2 inch border of pie dough around the edges.  Gently fold the pie dough up over the edge of the peaches, pleating it as you go.  Beat the egg and milk in a small bowl and brush on the exposed of the crust.  Sprinkle the crust with 1 tablespoon sugar.

In a medium bowl, combine all ingredients for the crumb topping except the almonds.  Using a pastry blender, cut the butter into the ingredients until the mixture resembles coarse meal and the pieces are no larger than small peas.  Toss the almonds into the mixture.  Mound the crumb topping into the center of the pastry, covering the peaches.  Use as much of the topping as will fit as it will cook down a good bit.  You may have a little left over.  

Bake the pastry for 35-40 minutes until the pastry and topping are lightly browned and the filling is bubbly.  Cool the galette for at least 20 minutes before slicing.  Serve with ice cream or freshly whipped cream.  

Printable Version


Monday, August 12, 2013

Chickens and Recipe Organization

It's been a while since I posted about our chickens.  Rosie, Ginger, and Judy are growing, growing, growing.  They eat almost constantly, and when they're not eating, they are enjoying daily dust baths in the sand and perching on their roost.  We live in the city and have fairly close neighbors, so even though we would love to allow the girls to free range, it isn't that easy where we are.  Not to mention, we have a large hawk that lives in a tree across the street and would probably love nothing more than a nice chicken dinner.  


So, we have a PVC chicken tractor that we use each day so that the girls have access to grass, weeds, and bugs but in a protected manner.  They love the tractor, and anytime they hear the lock on the backdoor unlatch, they get excited thinking they are headed for time in the grass.  


Their favorite green is clover, and my husband roams around the yard each day trying to locate some to feed them when they are in the run and coop.  It is really quite cute.  We have nicknamed one Piggy as she will eat most anything you give her and will even jump in the air to get it if need be.  


They also really enjoy fresh, cold watermelon as well as many other fruits and vegetables, and mealworms get them very excited.  Unfortunately, we are still waiting on the first egg.  I have read that Buff Orpingtons tend to lay later than some other breeds, but that doesn't make me less impatient. 


On another note, I spent the last day or so organizing my recipes (both the ones we already know we enjoy and the ones we want to try).  I always have the most difficult time once summer ends and I start working again to get dinner on the table each week.  It tends to take me too long to plan weekly menus and grocery lists and often leads to dinner out rather than us saving money and eating healthier meals at home.  

So, before heading into another school year, I organized and reorganized some of my meal planning resources.  Hopefully, it will make life easier.  I'll let you know how it goes.  

First, I retyped my list of tried and true menu options.  This list has been inside my cabinet for quite some time now, but it became cluttered and messy as I added to it over the years (using a pen).  I retyped it, and now I have a list of main dishes, sides, and salads that we know we like.  When I am planning a week's menu or grocery list, all I have to do is look on these sheets to find things I know will work.  The list is organized by poultry, beef, pork, meatless, sides, and salads and is posted on the inside of one set of cabinet doors.  I tend to grocery shop for the basics in a supermarket every two to three weeks and get veggies and fruits from the farmers market weekly which also saves me a lot of time.


I had a lot of recipe cards, printed recipes, and recipes ripped from magazines that needed help.  So, I went through them, discarded what no longer interested us, and organized the remaining recipes in plastic sheets in a binder according to salads, main dishes, sides, etc.  My goal is to use the binder as well as a list of recipes I am interested in the next time we want to try something new.  Most of the recipes on the typed list (which I stored inside the binder cover) are from Pioneer Woman, other blogs, or Pinterest. 


In addition, I decided to assign a different food type to each night of the week to make it even easier to plan.  So, my schedule is as follows.  Hopefully, it will be easy to stick with.  It is working so far.  


Monday- meatless
Tuesday- meat and veg
Wednesday- soup and/or sandwich
Thursday- pizza or pasta
Friday- wild card

Most of the time, we eat out one meal on Saturday and have leftovers to eat on as well throughout the weekend, so I am not assigning anything to those days.  Also, the schedule is just a guideline and veggies and sides obviously have to be added to it each day.  One nice thing about the rotation is it lends itself (most days) to meals that can be made with very little or even no meat at all which saves us time, money, and calories.    

I now feel much more organized and will hopefully be more motivated to cook each and every night of the week even when I don't necessarily feel like it.  Now, if only we could get an egg!