Monday, October 29, 2012

Pumpkin Chocolate Chip Muffins

I have always loved chocolate chip muffins.  I remember my mother making them from scratch many mornings, and I could just as easily enjoy those little treats for dessert as I could for breakfast.  My love affair with chocolate chip muffins has continued into adulthood.  

 
I had a difficult time imagining any muffin better than a chocolate chip one.  I mean, what could be better than the moist cakey inside studded with ooey gooey chocolate?  I'll tell you what...a pumpkin chocolate chip muffin.  That's what! 


When I stumbled upon this recipe, I was actually looking for a good muffin to make with my students at school.  One that they, as fourth graders, would enjoy mixing and eating.  This Nestle Toll House recipe from Very Best Baking fit the bill perfectly. 


Not only does this recipe contain pumpkin, chocolate, and whole wheat flour, it also makes plenty of muffins that keep well for several days and freeze beautifully.  I have been making this recipe both with my students each fall and at home ever since finding it several years ago. 


When I make them at home, I make the entire batch which is usually around 30 regular size muffins (even though the original recipe says 36), and I freeze the ones we don't eat in a day or so. 

 
To freeze, just pop them into freezer bags.  When you want to thaw one, remove it from the bag, wrap it in a paper towel, and microwave for around a minute until thawed and warm.  They make one of the best on-the-go breakfasts around. 


I have not changed this recipe at all except to use cinnamon instead of pumpkin pie spice (the original recipe calls for either).  As I said above, I do find that the quantities tend to be a little smaller, around 30 muffins instead of 36.  Even though this is not my recipe, I am reposting here to have on file for myself.  I give full credit to the original which you can find by visiting Very Best Baking

Pumpkin Chocolate Chip Muffins- makes approx. 30-36 standard muffins 

1 1/2 cups all-purpose flour
1 1/2 cups whole-wheat flour
2 teaspoons baking soda
2 teaspoons baking powder
2 teaspoons ground cinnamon or pumpkin pie spice
1/2 teaspoon salt
4 large eggs, slightly beaten
2 cups granulated sugar
1 can (15 oz.) pure pumpkin puree
1 cup vegetable oil
2 cups (12-oz. pkg.) semi-sweet chocolate chips

PREHEAT oven to 350° F. Grease thirty to thirty-six standard size muffin cups or line with paper bake cups.

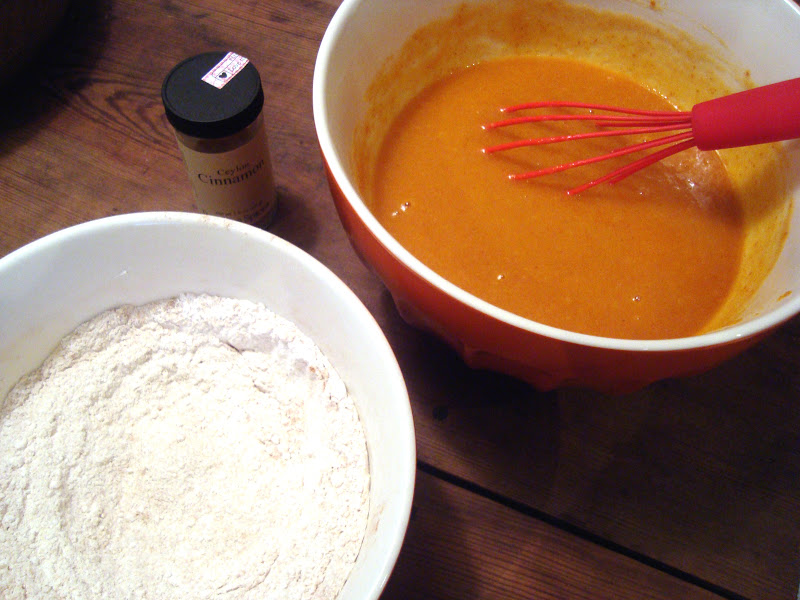
COMBINE all-purpose flour, whole-wheat flour, baking soda, baking powder, cinnamon and salt in medium bowl. Combine eggs and sugar in large bowl. Add pumpkin and oil; mix well. Stir in flour mixture until moistened. Stir in chocolate chips. Spoon batter into prepared muffin cups.

BAKE for 20 to 25 minutes or until top springs back when lightly touched or a toothpick inserted in the center comes out clean. Cool in pans on wire racks for 5 minutes; remove from pans.

TO FREEZE, allow muffins to cool completely on wire racks.  Place muffins into zip top freezer bags (usually 4 will fit in a quart bag), and freeze.  Frozen muffins will keep 2-3 months and can be thawed in the microwave. 


Printable Version

Saturday, October 20, 2012

Chicken with Brussels Sprouts and Mustard Cider Sauce

I have been doing a little more cooking and less canning lately, although I'm hoping to do more canning in the near future.  I have been slightly obsessed (as I get each fall) with cooking magazines and cookbooks, and I've been trying to add some new dishes to the weeknight line-up around here. 


This is a dish I had been meaning to try for awhile, but finally got around to several days ago.  It was perfect for a busy weeknight as it was quick to prepare, and it was so good it had me looking forward to the leftovers at lunch (which if you know anything about me and leftovers is really saying a lot). 


The chicken for this dish is browned in olive oil and finished in the oven. I roasted red potatoes in the oven with a little thyme and garlic which worked well because it allowed me to slide the potatoes over to make a little room for the chicken in the last 10 minutes of cooking.  This saved me one dirty dish which is always a major plus in my world.   

The Brussels sprouts were cooked until brown and tender in a separate pan while the sauce was being made where the chicken had been browned originally.  And let me tell you about this sauce.  It is amazing!  It's zesty and tangy from the whole grain mustard and slightly sweet from the cider.  I found it needed a tad more sweetness, so I added a little honey.  I also increased the quantity of sauce and thickened it with a cornstarch slurry.   

All in all, a very quick and satisfying fall meal that I will definitely be making again very soon!

Chicken with Brussels Sprouts and Mustard Cider Sauce- serves 4
Recipe adapted from Cooking Light 

2 Tbsp olive oil, divided
4 skinless, boneless chicken breast halves
1/2 tsp salt, divided
1/4 tsp freshly ground black pepper
1 1/4 cups chicken broth, divided
1/2 unfiltered apple cider
2 Tbsp whole-grain Dijon mustard
1 Tbsp honey
1/2 Tbsp cornstarch
2 Tbsp butter, divided
12 ounces Brussels sprouts, trimmed and halved

Preheat oven to 450 degrees.

Heat 1 tablespoon oil in a skillet on high heat.  Season the chicken with 1/4 teaspoon salt and pepper.  Add the chicken to the skillet and cook 3 minutes per side until nicely browned.  Place the chicken in an oven-proof baking dish (or on the sheet pan where you are roasting the potatoes if you choose to do so) and bake 9 minutes or until done. 

In the meantime, add 1 cup broth and the cider to the pan where the chicken was browned.  Scrap any bits from the bottom of the pan, and bring the mixture to a boil.  Reduce heat to medium low and simmer 4 minutes.  Ladle several tablespoons of the broth mixture into a small bowl and add the cornstarch to the bowl to create a slurry.  Whisk this mixture until the slurry is smooth with no lumps of cornstarch remaining.  Slowly whisk a little of the slurry mixture (you may not need to use it all) into the broth mixture in the pan and boil to thicken.  Add more slurry as needed until the sauce it thick enough to coat the back of a spoon.  Add the mustard and honey to the sauce and whisk to combine.  Remove the pan from the heat and swirl in 1 tablespoon of butter until melted. 

While making the sauce, heat 1 tablespoon of oil and 1 tablespoon butter in another skillet on medium-high heat.  Add the Brussels sprouts and saute 2 minutes to brown.  Season with remaining salt.  Add 1/4 cup broth to the pan, cover, and cook 4 minutes until the sprouts are crisp tender.  Serve the chicken topped with the sprouts and a drizzle of sauce. 

Printable Version

Saturday, October 13, 2012

Roasted Sweet Potatoes and Apples with Honey Butter Glaze

This time of year sends me into nesting mode.  I want to stay at home, make everything cozy, and cook, and the foods of fall seem to go seamlessly with my desire to be in the kitchen.  Even though it may seem a little silly, going to the farmers market becomes something even more special as you search for perfect bouquets of winter greens, freshly dug sweet potatoes, and colorful winter squash.  Our bodies begin craving heartier fare like these Roasted Sweet Potatoes and Apples with Honey Butter Glaze. 


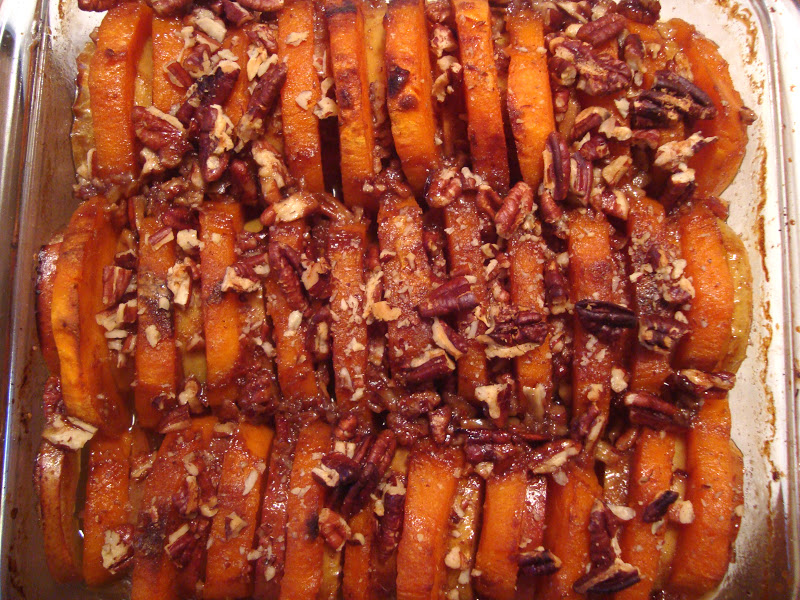
This layered dish is full of fall flavor and would make a welcome addition to the Thanksgiving table, although it is perfect any other day also.  It does take a little prep initially since you need to bake the sweet potatoes until they are almost tender, but after that, it goes together in a snap.  The sweet potatoes can also be baked a day or two ahead to make prep quicker on the day you want to serve this. 


The combination of creamy sweet potatoes, tender apples, crunchy nuts, and caramelized glaze is balanced perfectly by the addition of a little lemon juice and is a nice alternative to more traditional sweet potato dishes.  So, if you are testing recipes for the big Thanksgiving meal or just want something a little different for a cozy family dinner, this dish may just fit the bill. 


Roasted Sweet Potatoes and Apples with Honey Butter Glaze- serves 6
adapted from Southern Living Farmers Market Cookbook

This dish can easily be doubled to feed twelve. 

3 medium sweet potatoes (2.5 pounds)
2 large Honeycrisp apples (or other apples that will hold shape when baked)
2 Tbsp fresh lemon juice
1/3 cup packed brown sugar
1/4 cup honey
4 Tbsp unsalted butter
1/2 tsp cinnamon
1/4 tsp ground ginger
1/4 tsp kosher salt
1/3 cup chopped pecans

Preheat oven to 400 degrees.  Wash the sweet potatoes and pierce each with a fork or sharp knife.  Place the potatoes on a baking sheet and roast for 1 hour until almost tender.  Remove from the oven and allow to sit until cool enough to handle.  Remove the skin from the potatoes.  Cut each potato in half lengthwise and then into 1/3 inch thick semi-circle slices.  Set aside.  (This step can be performed up to two days ahead).  

Squeeze the lemon juice into a bowl.  Core the apples and cut in half.  Cut the apples in semi-circle slices.  Toss the apple slices in the lemon juice to prevent browning.  

In a small bowl, mix the melted butter, brown sugar, honey, spices, and salt until combined.  Set aside. 

Spray an 8 inch baking dish with cooking spray.  Place the sweet potatoes and apples with rounded sides up alternately in the baking dish.  Pour the lemon juice from the apple bowl over everything in the dish.  Spoon the honey butter mixture over the potatoes and apples.  Bake 30 minutes. 

Remove dish from the oven.  Baste with the honey butter from the bottom of the dish.  Sprinkle with pecans, and continue baking 15 minutes more until everything is tender and the nuts are toasted and brown.  Baste with the glaze just before serving.  

Printable Version


Sunday, October 7, 2012

Pear and Cranberry Conserve

Pears are a quintessential fall fruit.  Fragrant, sweet, and floral, they pair well with another favorite, the tart cranberry.  Combining the two makes perfect sense as they balance one another allowing us to create foods that travel from sweet to savory effortlessly. 


This conserve is the perfect example of this marriage.  Sweet from the pears with just the right bite from cranberries, you can serve this on biscuits or toast, with roasted pork or turkey, or as an alternative to traditional cranberry sauce.  It would make an absolutely fabulous spread on an after-Thanksgiving sandwich of turkey, dressing, and gravy, and it also makes a delicious addition to a vinaigrette for salad greens when mixed with a little vinegar and olive oil.  Better yet, it comes together fairly quickly and easily. 

I used a combination of half-pint jars and 4 oz jelly jars when making this to give myself options for how much to open at once.  If you want to use the smaller 4 oz jars, just process them for the same amount of time as the half-pints. 

Pear and Cranberry Conserve- makes 7 half-pints or 14- 4 oz jars
Recipe from Better Homes and Gardens Canning

6 large, ripe pears (3 pounds), peeled, cored, and chopped
16 oz fresh cranberries
4 cups granulated sugar
1 1/4 cups water
2 Tbsp lemon juice
2 Tbsp grated orange zest
1/8 tsp ground cinnamon
1/8 tsp ground allspice

Prepare your canner, jars, lids, and rings.

Combine all ingredients in a large non-reactive pot.  Bring the mixture to a boil on medium heat, stirring to dissolve the sugar.  Boil gently, stirring frequently, for 20-25 minutes until the mixture reaches a thick jam-like consistency.  You can test this by dipping a spoon into the mixture.  If the conserve falls in sheets from the spoon, it is ready.  Alternately, you can chill a plate in the freezer, then place a small amount of conserve onto the cold plate.  It should form a mound and should hold a clean line if you run your finger through it. 

Ladle the hot mixture into hot, sterilized half-pint or 4 ounce jars, leaving 1/2 inch headspace.  Wipe the rims of the jars, and place a lid and ring on top of each. 

Process jars in a boiling water canner for 10 minutes.  Remove jars from the canner and allow to cool on a towel for 24 hours.  Check seals, label, and store.

Printable Version

Sunday, September 30, 2012

Five Minute Bread

I love homemade bread, but who has time to make great, crusty bread on a regular basis?  With all the mixing, kneading, and proofing required to produce a loaf, you need hours in the kitchen, and that isn't even factoring in keeping a starter alive for those deeper flavored loaves. 

Well, I found a solution in the book Artisan Bread in Five Minutes a DayI know what many of you are saying...this book has been around for several years now.  I know, and I have no idea how I am just now discovering it, but I am so glad I have. 

A free-form loaf slashed with three scalloped cuts on top.
This book and the accompanying website, Bread in Five, from its authors outline a new approach to bread making for those of us with little time to spare.  You can simply mix up a batch of high-moisture dough, skip the kneading process, and keep the dough in the fridge for up to 2 weeks, cutting off and baking sections as needed.  It will take you a little time to get each batch of dough going, but once it is mixed, the hands-on time is minimal at about five minutes per loaf.  You can remove a chunk of dough, let it rise for 40 minutes while you do other things, and bake it.  Best of all, it produces a loaf that is crusty on the outside, and chewy yet moist on the inside.  People will never guess that you have spent almost no time in the kitchen to produce a pretty impressive loaf. 


One other great thing about this dough is that you can continue to use the same storage vessel for mixing new batches, and each time you do the flavor of the dough will deepen due to the bits of leftover dough that get mixed in to the new batch.  After several batches, you have a dough with a much more developed flavor, all without the need or use for a starter. 
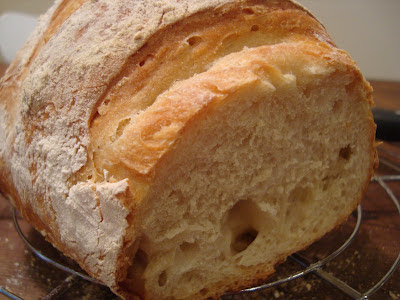
 
The inside of the finished loaf has a nice, chewy texture.
This dough is also very versatile, allowing you to make all sorts of breads without mixing multiple batches.  With the master recipe I have made free-form loaves like the one pictured above as well as baguettes and pita.  It is fabulous to be able to have a loaf of bread when I want or need one without a trip to the bakery. 

Part of a baguette made with the same dough.  The baguette does not get dusted on top.
Pita made with the same dough.  The pita is rolled thin and then puffs as it bakes.  You do not need to add water to the broiler pan when making the pita as you do not want it to get crusty. 
Below, I am only outlining the basics of the Master Recipe and how to form a free-form loaf.  For more information on this recipe visit Mother Earth News, or visit Bread in Five for more dough and loaf types. 

Five Minute Bread- makes enough for four 1 pound loaves
adapted from Artisan Bread in Five Minutes a Day

To make this bread, you will need the following ingredients as well as a pizza stone, pizza peel, and the bottom portion of a broiler pan.

3 cups lukewarm water
2 packets active dry yeast (1 1/2 Tbsp)
1 1/2 Tbsp kosher salt
6 1/2 cups unsifted, unbleached all-purpose white flour
cornmeal for dusting pizza peel

Mixing and Rising the Dough:  Place the water in a large bowl or large plastic food container with the salt and yeast.  You do not need to let the yeast sit for any period of time before adding the flour.  Add the flour to the water and yeast.  Use a wooden spoon to incorporate the flour.  If it becomes too difficult, wet your hands, and finish mixing manually.  Cover the bowl with a towel or lid (not airtight) and allow the dough to rise for 2 hours until the dough has risen and is beginning to flatten on the top.  At this point, the dough is ready to shape or store.  It is a little easier to work with if it has been refrigerated for a day before the first baking.   

Shaping the Loaf:  You will not need to knead the dough before shaping.  Instead, when ready to make a loaf, simply cut off a 1 pound piece of dough and shape it into a loaf by stretching it and turning the ends under to create a ball of dough.  The ends will all be bunched under the loaf which is fine, but the top should be rounded and smooth. 

Slashing, Dustin, Resting, and Rising: Sprinkle cornmeal on a pizza peel.  Place the shaped loaf on the pizza peel.  Liberally dust the loaf with all-purpose flour.  Using a serrated knife, make several 1/4 inch deep slashes in the top of the dough.  Allow the dough to rest on the pizza peel for 40 minutes.  The dough may not rise much during this time, but it will rise more in the oven.  About 20 minutes into the rising process, place your pizza stone on a middle rack in the oven.  Place an empty broiler pan on another rack.  Heat the oven to 450 degrees.  

This loaf was dusted and slashed in a tic-tac-toe pattern.  This is a picture of it after rising. 
Baking:  After 40 minutes of rising, transfer the loaf from the pizza peel to the pizza stone.  Quickly and carefully pour 1 cup of hot water into the broiler pan and close the oven door.  Allow the loaf to bake 30-40 minutes until the loaf is very brown and sounds hollow when tapped on the bottom.  Since this dough is very moist, you can bake it until it is nicely browned without drying it out inside.  Remove the loaf to a wire rack to cool.  It will make crackling sounds as it cools resulting a crusty outer shell.

Storing the Dough:  Keep the dough in a covered but not airtight container in the refrigerator for up to 14 days, cutting pieces of dough out to shape, rise, and bake when needed.  When you are ready to make more dough, simply mix the new batch in the same, unwashed bowl, mixing in the older bits of dough into the new. 

Printable Version


Sunday, September 23, 2012

Pear Sauce

I know I haven't been posting quite as much lately, and I am sincerely hoping to remedy that soon, but with a new year of teaching beginning and lots of changes at work, it has been a little difficult to get to the computer to talk about food. 

This weekend, however, really makes me want to talk about food and really made me want to be in the kitchen.  It has been lovely.  Cool, crisp air with hints of fall in the colors on the trees.  I am officially in nesting mode.  This always happens to me this time of year as I'm sure it happens to many of you.  I just want to stay at home, plant flowers outside, and cook away.  I spent this weekend baking a delicious pumpkin chocolate chip pie (more on that to come) and realized that I still needed to tell you about some of the pear goodies I canned before it's too late and not a (local) pear is to be found. 


So, I'm going to take this opportunity to tell you about the pear sauce I made using those old-fashioned hard pears from my mom's backyard tree.  Any pear would do, but they should be ripe and sweet.  The sweeter the pears, the less sugar you will need to use, so choose wisely. 

Pear sauce is just like applesauce but made with pears.  It can be eaten alone, used as a condiment to roasted meats, or used in baking.  The instructions below are much more of a method than a recipe.  You will need to increase the ingredients to fit the quantity of pears you have on hand.  I multiplied the quantities below by four because I had 12 pounds of pears, but you can certainly do smaller batches.  Every 3-4 pounds of pears will yield approximately 2 pints of sauce or 1 quart.  Therefore, my twelve pounds yielded about 8 pints of sauce.  You can adjust the amount of sugar after tasting, using more of less as desired, but do not change the quantity of lemon juice as it is necessary for proper acidity and to prevent your pears from browning.  You can also add spices to the sauce, if desired.  Cinnamon, ginger, cardamom, and nutmeg would all be tasty additions.   

You also have two options for peeling.  If you own a food mill, you can skip the peeling and seeding step because the food mill will remove those elements when you pass the pears through it.  If you do not own a food mill, you will need a food processor in which case you will need to peel and seed the pears before cooking so that they can go directly into the processor when soft.  Below I give directions for both.  

Pear Sauce- yields 2 pints or 1 quart (increase quantities for larger batches)

3-4 pounds of ripe, sweet pears (peeled and seeded if using a food processor, unpeeled if using a food mill)
1 Tbsp bottled lemon juice (bottled lemon juice has consistent acidity)
1/4-1/2 cup water (to prevent sticking and help create a desirable consistency)
2 Tbsp sugar (you can increase or decrease this amount as desired)

Prepare your jars, lids, and boiling water canner.

Combine the water and lemon juice in a large nonreactive pot.  Place the prepped pears in the pot and toss with the lemon water to prevent browning.  Bring the pears to a boil over medium high heat.  Once boiling, reduce heat and simmer until the pears are soft and tender, about 20 minutes. 

Remove the pot from the heat and cool several minutes. If using a food mill, pears can be added peel and all to the food mill and passed through to create a sauce.  If using a food processor, scoop your peeled pears into the machine and process to your desired consistency. 

Place the sauce back into the pot.  Add sugar to taste, adjusting depending on the sweetness of the pears.  Bring the mixture back to a boil over medium heat, stirring to prevent scorching. 

Ladle hot sauce into hot pint or quart jars leaving 1/2 inch headspace.  Remove air bubbles and top each jar with a sterilized lid and ring.  Process in a boiling water canner for 15 minutes for pints or 20 minutes for quarts (adjusting time for altitude as needed). 

Remove jars from the canner and place on a towel to cool for 24 hours.  Check seals, label, and store. 

Printable Version


Sunday, September 16, 2012

Fig Newtons

Fig newtons are one of those cookies (are they a cookie?) that seem a little healthier than others, and sometimes I crave fig newtons when I want something a little sweet.  When my mom gave me figs from her backyard tree I tried to find a unique way to use them aside from simply eating them fresh or making preserves.  I thought a batch of fig newtons would fit that bill, so I looked online and in books for homemade fig newton recipes.  


The problem was finding a recipe that actually used fresh, rather than dried, figs in the filling.  That's when I stumbled upon The Beantown Baker's version of these little treats.  In her recipe, Jen uses fresh figs and a shortbread-like dough to come up with a pretty solid approximation of a fig newton.  


I found that the cookies/bars were a little softer than a store-bought newton, but I actually preferred this after tasting.  The filling was perfect and was preferable as well (at least to people who tried them).  My mother-in-law said it nicely when she commented that the filling was less "gritty" than in a store-bought newton which was due to the fact that even though the seeds were left in the fig mash, they somehow were less noticeable in the final product.  


All in all, this is a great recipe that will have you craving fig newtons from your oven rather than the supermarket.  A word of advice...do not omit, for any reason, the orange zest from the dough.  It adds fantastic flavor and makes the newtons taste more authentic.  


Since I used the recipe as it was on The Beantown Baker blog, so I am not going to re-post it here.  Go over and visit Jen using the link above to get the recipe and try these yummy little goodies for yourself.