Monday, January 18, 2016

Flourless Peanut Butter Cookies

I know I am sharing more baking recipes lately, but my dinner menu usually consists of old standbys as we try to accomplish some projects around here. Last night, when making one of my dessert standbys, I realized I had never shared these insanely, awesome, yummy cookies here.  So here goes.  


These are the best and easiest cookies you will ever make.  They mix up like a breeze and are always consistent.  I know that many people enjoy making cookies, but I am not one of those people.  These cookies are so good and so easy that even I don't mind mixing them up.  


The recipe yield is on the smaller side at only about 25-30 cookies, but I have doubled and tripled this recipe with good results.  Just make sure if you triple that you are using a large bowl on a stand mixer.  If you are just making a regular size batch, they can be mixed by hand with no difficulty.  


These cookies are also very versatile depending on what you have on hand.  I have made them with natural peanut butter and regular.  I preferred the natural although there was nothing wrong with the regular batch at all.  I have made them with chunky peanut butter and creamy.  I prefer chunky because I love the pieces of peanut, but another great alternative if you use creamy is to add 1/3 cup chopped salted peanuts when you add the peanut butter chips.  They are excellent this way.  You can also leave out the peanut butter chips altogether or substitute chocolate chips in their place. You can make these the size listed in the recipe or make them larger if you prefer (just make sure you bake them a tad longer).   


Seriously, you just can't go wrong with these cookies.  


Flour Peanut Butter Cookies- makes approximately 25 cookies

I simply drop my cookies and flatten them ever so slightly with a glass or the tines of a fork.  If you prefer rounder, neater cookies, you can roll them in a ball first and then bake.  I never see a need for this though.   

1 cup brown sugar
1 cup crunchy peanut butter (natural or regular)
1 large egg
1 tsp baking soda
1 tsp vanilla extract
1 cup peanut butter chips

Preheat oven to 350 degrees.  Line a baking sheet with parchment paper.  Using a spatula, mix brown sugar and peanut butter together in a large bowl (or in a stand mixer). Mix in the egg, baking soda, and vanilla.  Stir in peanut butter chips.  Drop by tablespoons onto baking sheet leaving 2 inches between each cookie.  Using the bake of a glass, slightly flatten each cookie (this is optional but results in more consistent cookies).  Bake 10 minutes.  Cool on wire racks and store in a covered container.    

Thursday, December 31, 2015

Attempting Babka

I recently got energized to bake, and since I am off for winter break, I decided to try my hand at something new.  I had snapped up a copy of a relatively new magazine titled Bake From Scratch while out shopping, and it has some interesting recipes inside.  I have also been a bit hooked on the show The Great British Bake Off, and I especially love that each episode centers around one type of baked good.  I kept telling my husband after finishing the most current season of the show that we should really start baking together, choosing one type of recipe to "master" before moving on.  That hasn't happened yet (and probably never will), but we did try our hand at babka a few days ago. It was extremely tasty, although there are things about it that weren't quite right for me, and I am determined to play around with it until I am completely and utterly satisfied (although I will have to wait some time between experiments as it is, of course, very rich in flavor and calories).  


Here is my first attempt.  You can certainly use the recipes listed if you wish.  I will share what I liked about them and what I plan to change for the next go 'round. Then once I have made it again, I'll let you know how it went.  In the meantime, if you want a rich, unique bread for dessert, breakfast, or just a special treat, this is a good place to start.  I am also eager to try this with a jam filling and streusel topping.  I will say that although the bread looks complicated it is actually fairly simple to make and turn out a pretty decent loaf.  It was time consuming and a little messy, but it was worth it.   


The recipe makes two loaves, so I opted to fill each with a different filling.  I used a chocolate filling for one loaf and a cinnamon pecan filling for the other.  Both were delicious.  The chocolate version allows the brioche-like dough to really shine, and we liked the subtle orange flavor of the dough. 


The cinnamon pecan version was all about the filling. It was much richer, much sweeter, and we really want to try to cut back on some of that in our next attempt. When I'm trying something new, I tend to stick fairly closely to the recipe so I know what it is like as written before I start altering it too much.  Once I've tried it, then I have no problems making changes which I will definitely be doing with this loaf.  While it was exceptionally delicious, I cannot justify eating that much butter or sugar in a single slice of bread, and I want to taste the bread rather than just the filling.  If you want a bread that tastes like an inside out sticky bun, though, this is the bread for you.  


The chocolate babka is filled with a mixture of melted semi-sweet chocolate, sugar, cocoa, and butter that was cooled before spreading over the dough.  To fill the babka, you roll the dough into a rectangle, spread the filling on top, and roll it up jelly-roll style. You then cut the roll in half lengthwise and twist the two resulting pieces together allowing the filling to remain facing up.  This allows you to see the filling from the top but also to get the swirl of filling and bread when you cut into the loaf.  I was happy with the rise on my chocolate loaf as well as the texture and appearance.  I did make a mistake though and added the entire filling recipe even though I later realized it was meant to be split between the two loaves.  What can I say, it was very late at night, and my brain was heading into sleep mode.  The result was a thicker ribbon of chocolate (maybe a little too thick if that is possible with chocolate).  Next time I will use half the chocolate filling in one loaf as I am sure the recipe intended.  I can definitely see how that would have been an appreciated mistake for chocolate lovers though. 


The cinnamon pecan babka was filled with a mixture of cinnamon, nutmeg, butter (lots of it), finely chopped pecans, and sugar.  I did use the correct amount of filling in this loaf, and the filling is delicious.  It keeps the babka super moist on the inside, but it has so much butter in it that the babka did not rise as much as it should have in baking.  Even though this type of dough is rich and full of butter, there is a point at which it can become too rich and the dough structure cannot support the amount of fat.  It can cause the dough to collapse in on itself, leaving gaps in between the filling and bread.  While this recipe did not have extreme issues with that, it did teeter on the edge.  I will definitely make this again, but next time, I will alter the filling by adding less butter and sugar and more nuts.  While the nuts were there, they were not as prevalent as I would have liked, and I think adding more nuts and less fat will help the structure of the dough as well as the taste. It will also allow me to more easily justify eating it.


Here are the recipes I used.  I am writing them here in their original form.  I will be making changes to them in the future.  The filling recipes are for two loaves.  If you plan to fill each loaf with a different filling, halve the filling amounts for each.  I also created a glaze for the Cinnamon-Pecan Babka.  It was made by mixing 2 tablepoons milk with 1/2 cup confectioners' sugar and 1/2 tsp vanilla.  I drizzled it on once the loaf was completely cool.  The glaze is completely optional.

Babka- Makes 2 loaves

Dough: 
6 1/2 cups all purpose flour
3/4 cup sugar
1 Tbsp active dry yeast
1 Tbsp orange zest
4 large eggs
3/4 cup milk
1 tsp vanilla extract
16 Tbsp unsalted butter, softened
1 Tbsp kosher salt

Egg Wash: 
1 egg and 1 tablespoon water beaten together.

Simple Syrup: 
1/2 cup sugar and 1/2 cup water heated to boiling to dissolve sugar and then cooled slightly.

Chocolate Filling (enough to fill two loaves): 
1 cup semi-sweet chocolate chips
3/4 cup unsalted butter
3/4 cup confectioners' sugar
1/2 cup cocoa powder
1/2 tsp kosher salt

For Chocolate Filling: Heat butter and chocolate chips over medium heat in a saucepan, stirring frequently, until mixture is smooth.  Remove from heat and whisk in confectioners' sugar, cocoa, and salt.  Allow to cool completely.

Cinnamon-Pecan Filling (enough to fill two loaves): 
2 cups unsalted butter
2 cups sugar
4 tbsp ground cinnamon
2 tsp grated nutmeg
1 cup finely chopped pecans

For Cinnamon-Pecan Filling: Using the paddle attachment on a stand mixer on medium speed, mix butter and sugar until blended.  Add cinnamon, nutmeg, and mix again until incorporated. On low speed, mix in the pecans.  

For the dough: Spray two (8 inch) loaf pans with cooking spray and line each with parchment paper.  In a stand mixer with a dough hook, combine flour, sugar, yeast, and zest on low speed.  Add eggs, milk, and vanilla.  Beat until dough comes together, 2-3 minutes.  Add more milk 1 tablespoon at a time if mixture seems too dry.

With mixer on low, add butter, 1 tablespoon at a time.  Add salt, beating just to combine.  Increase speed to medium, and beat until a smooth and elastic dough forms and pulls away from the sides of the bowl.  Add more flour 1 tablespoon at a time if dough does not pull away.  

Spray a large bowl with cooking spray.  Place dough in bowl and let rise in a warm place for 1 1/2 to 2 hours until doubled in size.  You can also let the dough rise in the refrigerator overnight instead. 


Assemble Loaves: Divide dough in half.  On a floured surface, roll one half of dough into a 12 by 9 inch rectangle.  Spread dough with desired filling leaving a 1 inch border on all sides.  Brush border with egg wash, and roll dough starting at the longest side, jelly-roll style.  Press edges of dough to seal.  Using a large, sharp knife, cut dough in half lengthwise.  Twist the dough pieces around each other with cuts sides up.  Place in pan, cut sides up.  Repeat with the second half of the dough.  Cover and let stand in a warm place 1 to 1 1/2 hours until doubled in size.  

While dough is rising, preheat oven to 350 degrees.  Bake loaves 30 minutes.  Cover with foil, and bake another 30 minutes (note- I did not cover mine with foil for the second half of the baking.  They were not brown enough.)  

While babka bakes, prep the simple syrup (if you have not already).  Once a skewer can be inserted in middle of babka without dough on skewer, remove babka from oven.  Allow to cool slightly.  Pour half simple syrup over each loaf (it looks like a lot, but it needs the entire amount to stay moist).  Let cool in pans 5-10 minutes.  Remove loaves to wire rack (with parchment paper underneath) to cool completely. 


Sunday, December 13, 2015

Turkeys Part Two: Lessons Learned

In case you didn't catch part one of my turkey post, here is the linkAs I was discussing in that post, we had read that 24 weeks was a reasonable amount of time for the turkeys to reach their optimal weight.  My husband loaded the turkeys up in the wee hours of the morning and drove them an hour or so to a processing facility.  He was able to stay with them and watch the process which he said was very quick and seemed to be as painless as possible.  The man at the processing plant had a little difficulty with one of our toms due to his size which was my husband's first clue that maybe our turkeys were a little different than most. 


When asked how we wanted the turkeys processed, my husband told them we wanted 1 male and 1 female left whole and the other male and female cut into parts.  And here is where we learned our first lesson.  When asked how you want the turkeys processed, it is a good idea to ask how much each weighed before making a decision.  Turns out we had some very large turkeys on our hands.  Our males weighed in at just over 40 pounds each after being processed.  Yes, that's right.  Forty pounds per tom!  I don't even have an oven large enough for a 40 pound turkey.  If I had known they were that large under all those puffy feathers, I would have opted to get both toms cut up and the females left whole.  The females weighed in at a much more reasonable, albeit heavy, weight of approximately 20 pounds each.  


The plant manager explained that most people bring their turkeys in somewhere between 16 and 20 weeks which is definitely our second lesson learned.  The 24 week time frame worked well for the females, so another option would be to buy sexed birds the next time so that you're working with either all females or all males.  Either that or process them at different times. 


When we got the birds back home, we were barely able to fit them in the upright freezer.  In fact, we thought the freezer door was closed but as it turned out the suction on the door was not as strong because of the one of the tom's legs sticking out just a bit too far which resulted in a thawing of some of the veggies in the freezer.  We were able to salvage most though.  That's lesson number three.  Always check the upright freezer to make sure the door is closed tight when storing 120 pounds of turkey inside.  


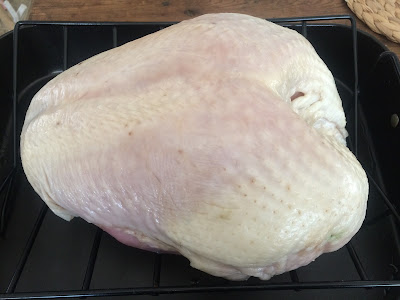
So, we stored the turkeys until Thanksgiving at which point we thawed one turkey breast (from one of the hens).  The turkey breast weighed in at a little over 9 pounds.  We made a mixture of melted butter, orange juice, rosemary, salt, and pepper, and basted the turkey with the mixture throughout the cooking process.  It turned out to be absolutely scrumptious.  Much more flavorful than turkeys you buy at the store and more moist also.  We served it alongside a sweet potato casserole, dressing and gravy, and Brussels sprouts with bacon.  It was a yummy meal and one for which we were truly thankful.        

Saturday, December 5, 2015

Turkeys Part One: Raising Our Own Birds

It has been such a long time since I posted.  My life has been a little crazy lately, and I never really felt like I had anything worthwhile to say here.  I did miss it though and have felt guilty for letting everything keep me from posting.  I am going to try to get back on the wagon and post more.  

I hope everyone had a nice Thanksgiving.  Ours was spent out of town with family, and we enjoyed every minute of it.  When we got back in town, we decided to cook up one of our turkey breasts from the turkeys we raised this year.  We had not tried any of the meat and really wanted leftovers for turkey sandwiches which is something you really don't get when you go out of town for the holiday.  


Before I tell you about the turkey and how it tasted, let me give you a little information about these birds.  I know I have mentioned here that we were raising turkeys, but I never really went into detail.  

On April 2 we purchased four Broad-breasted Bronze turkeys.  They were a day old at that point.  We raised them inside in a brooder just as we do our chicks.  The turkey poults grew very quickly, much quicker than the chickens we got around the same time.  It turned out that out of the four, there were two females and two males.  Within a month or so they had outgrown the brooder.  My husband then built a turkey tractor to house them.  These are pictures of the tractor in progress.  It is made of lumber, cattle panels covered with smaller welded wire, and metal and plastic ties.  We covered it with a tarp to keep out the rain, hung the food and water, and made a roost for the turkeys to sleep on.  The turkeys then moved outside to their new home.  


We locked the turkeys in at night for protection, but during the day they had access to a large grassy area that was fenced with a large portable poultry fence.  They were moved around regularly to give them fresh grass.    Occasionally they did get out of the fence, but they were easy enough to manage and were, for the most part, very easy to care for.  My husband did have to go out each evening and shoo them into the tractor because they always hunkered down under the tree instead.  


They ate specialized poultry feed for turkeys and game birds, bugs and grass, and vegetable/fruit scraps.  You do have to be careful with turkeys because they will eat anything put in front of them and aren't the smartest animals.  They were always very fascinated by the yellow caution sign attached to the poultry fence.  


They were also very entertaining. The hens were extremely curious, pecking at you if you got close enough and getting right in the way of the camera.  The toms, on the other hand, were much more skeptical and puffed up immediately as soon as anyone came near.  They never became aggressive though, which I had been a little worried about early on.  


We raised them this way for approximately 24 weeks.  Everything we had read suggested that was a good amount of time, allowing the turkeys to grow to a reasonable size.  We scheduled to have them processed at Foothills Pilot Plant (a North Carolina plant specializing in humane small flock processing for farmers in the state).  We chose to let the plant process the turkeys because we had never processed turkeys before and were not confident we could deal with such large birds.  Turns out that was a pretty smart decision (more on that later).  


In the early morning hours, my husband loaded the four birds into crates on the back of the truck and hauled them a little over an hour to the plant.  That's where our lessons in raising turkeys really began...  


Thursday, August 6, 2015

Cinnamon Spiced Peach Peel Jelly

I love to can things that allow me to use ingredients that would otherwise be discarded.  Recently I was faced with a 20 pound box of peaches from the folks at Sweet Preservation and the Washington State Fruit Commission as well as four quarts of local peaches I already had on hand. 

  
I decided to freeze the four quarts of peaches to use in oatmeal, cobblers, and the like throughout the winter. I peeled them, sliced them, and tossed them with a little sugar before dividing them into quart bags.  


The rest of the peaches (20 pounds), I peeled, halved, and canned in a very light sugar syrup.  We like to eat peaches like this straight out of the jar.  

When I got started on those peaches, I had it in my mind to peel them by dunking them in boiling water and then in an ice bath.  This allows the skins to slip off easily and without much effort.  I changed my mind though and decided to peel them by hand.  The peaches were absolutely huge with each one weighing in at about 3/4 of a pound (sorry I don't have a picture), and I thought that if I peeled them by hand I would have a little more meat left next to the peel.  

Now, in the world of canning (or cooking for that matter), you generally do not want fruit taken away when you peel it, but my thoughts on this were that in peeling by hand and inevitably removing just a bit of the meat of the peach, I would have very flavorful peels to make peach peel jelly.  

I had read about peach peel jelly before, although I could not find a recipe from any official sources such as National Center for Home Food Preservation. I knew peach peel jelly to be something traditionally made to prevent waste and to create something with nothing.  That sounded good to me.  I had also read negative reviews though that stated that the peach peels did not lend enough flavor to make a strong, peachy juice.  

Peach juice after straining
I decided to try to remedy that by peeling by hand.  I washed my peaches well, peeled them by hand, and tossed the peels in a large pot along with three (4 inch) cinnamon sticks.  I covered the peels with water, brought the mixture to a boil, simmered for 10 minutes, and turned off the heat.  I then allowed the mixture to cool on the counter for a few hours.  I refrigerated the cooled mixture overnight allowing my peach peels to steep even longer. 

Peach juice and enough sugar for two batches waiting to be made into jelly

In the morning, I strained the solids from the liquid, and then strained the liquid through a clean, white pillow case to remove all sediment.  You could strain through cheesecloth, but you will most likely need to do it several times to remove all solids.  A jelly bag would also work well if you have one. 

Cinnamon Spiced Peach Peel Jelly

Once strained, I had clear, pink peach juice.  I measured my juice into 3 cup portions (I got 6 cups of juice total- enough for two batches).  You do not want to double the recipe as the jelly may not set up as well in double batches.  I made one batch, spooned it into my jars, and then made another batch.  The first and second batches then went into the canner together for 5 minutes.  


The results are a sweet, very peachy, and slightly spiced jelly.  It reminds me of peach cobbler.  It is absolutely delicious and a great way to use something that would otherwise be discarded.  By the way, the chickens enjoyed the peels the next morning after I strained the juice.  

Cinnamon Spiced Peach Peel Jelly- makes 4 half-pints

Note: You must begin this recipe the day before you plan to make the jelly so that your juice is ready. The juice recipe that follows makes enough juice for at least 2 batches of jelly.   You can make as much or as little juice as you want by following the same directions and just adjusting quantities. 

3 cups peach juice made with 3 (4 inch) cinnamon sticks
1 box powdered pectin
3 cups sugar
 
To make peach juice the day before:  Combine the peels of approximately 20 pounds of peaches with 3 (4 inch long) cinnamon sticks, and enough water to just cover.  Bring to a boil.  Simmer 10 minutes.  Remove from the heat and allow to cool.  Refrigerate overnight.  In the morning, strain the solids, and then strain the juice through a clean pillowcase, jelly bag, or several layers of cheesecloth until the juice is clear.  You may need to repeat straining process several times.  Measure out 3 cups of peach juice for each batch of jelly.  
 
For the Jelly: Combine the peach juice and pectin in a large pot on medium high heat.  Bring to a boil.  Add sugar all at once, stir to combine, and bring to a full rolling boil.  Continue to boil until the mixture reaches 220 degrees and sheets off of a spoon.  This may take anywhere from 3 to 5 minutes.  

Pour jelly into half-pint jars, top with lids and rings, and process in a boiling water bath for 5 minutes.   

Thursday, July 16, 2015

The Two Lone Rangers

I don't often post about our chickens, and I definitely don't post multiple times in a week, but I thought I would share a quick snippet from the lives of our two "lone rangers".  
Broody Piggy in the nesting box- notice how she is puffed up.


We have had our three Buff Orpingtons for several years now.  When we moved to the country and incorporated eight more chickens to the mix including one rooster, they all lived happily for a short while.  Then, the rooster, wanting to be the boss that he thinks he should be, began trying to mate with the three Orpingtons.  One of them, Rosie, took to it well enough.  She is quick and can usually get away from his advances, but when she doesn't it's not the end of the world for her.  Another chicken (Piggy), however, was used to being the ring leader among the three, and she did not take well at all to big Al (that's the rooster).  She would escape him each time, and he did not like that one bit.  So, to make a long story short, Al attacked Piggy several times to the point of drawing blood at which point we moved Piggy and her chicken buddy, Chippy, to live on the other side of the coop separated from the others.  One might think they get lonely, but they don't.  They are perfectly happy without the antics of the other chickens and the "leadership" of a male.  In fact, they probably have the best life of any of the chickens.  While the other chickens are enclosed within a portable chicken fence, Piggy and Chippy free range all day.  They don't travel far, but they travel together. 
She is puffing up to tell me to leave her alone.
The problem is that Piggy has a tendency to go broody.  This means that she wants to sit for several weeks on eggs in hopes of hatching chicks (which of course will never happen since she and Chippy do not have contact with Al).    She has been prone to broodiness all her adult life, and in the past we have tried to break her from being broody without much success.  Now that we get plenty of eggs each day and don't miss it if she isn't laying, we leave her be for the most part.  We do try to coax her out of the nesting box when it is extremely hot, and these days we try to get her out at least a few times a day to be with Chippy.  

Chippy camped out under the table saw.
I feel bad for Chippy roaming around on her own.  She has gotten to the point where she just camps out in the shed with the tractor or on the other side under the table saw during the heat of the day, and she will roam a little when Piggy is out.  

The bad thing is that Piggy is nesting in Chippy's favorite box which has led Chippy to lay several eggs under the table saw in the shed.  This is not a habit we want to stick as we don't want to have to go in search of eggs each evening.  So, here's hoping that the broody chicken snaps out of it quickly this time and the two lone rangers can keep doing their thing (together).  

Wednesday, July 15, 2015

A Non-Stop Summer Week

The garden has been going crazy!  Buckets of tomatoes, loads and loads of zucchini and squash, and melons ripening on the vine.  We had several pumpkin plants at the edge of the garden and we pulled 3 pie pumpkins off of them last week.  At this point, we have preserved almost everything we wanted, and therefore, we are letting the zucchini and squash plants fend for themselves from here on out.  

A pan of produce- we are getting this much every couple of days
We will continue to maintain the tomatoes and melons, but other than that we will buy corn and lima beans to freeze, and we'll call it quits until we plant fall crops.  I have been so pleased with the garden this first year.  I have spent very little money on produce to can and freeze, and that makes it all worth it.  

These were cut in half, and roasted, and then the puree was frozen.
I spent last week canning roasted garlic and herb pasta sauce (our favorite), roasted salsa verde, pickled corn and pintos, sweet pickle relish (more on this to come), tomato salsa using this recipe, and freezing lots of stuff as well. 

I froze 10 quarts of shredded zucchini to use for zucchini bread, and I made 3 batches of zucchini bread and froze those as well. I also froze zucchini in chunks to use in Chicken and Veggie Tostadas and casseroles. Is there any plant more resilient (or annoying) than zucchini?  I swear every time I walk through the garden I come in with an armful of summer squash.   


I did not plant cherry tomatoes, so when I came across a gallon of them at the farmers market for $7, I snapped them up.   I definitely need to add this to my list of things to plant next year.  


I enjoyed some of them on a BLT salad to which I also added fresh corn kernels.  Yum!

 
The rest I cut in half, tossed with olive oil, and sprinkled with salt, pepper, and dried basil.  I then spread them on sheet pans and roasted them in the oven on 200 degrees for a couple of hours until they were chewy and most of the moisture had evaporated.  They are so sweet like little tomato candies.  I packaged them in pint containers and froze them.  I will use them in pasta and sauces throughout winter.   

  
I had a half row of basil plants in the garden which gave me enough to use in my pasta sauce and plenty to make pesto.  I ended up making about 4 batches using this recipe with each batch being quadrupled in volume (I used slivered almonds instead of pecans this year).  I froze some in 4 oz containers because one container is perfect for a pizza or pasta meal.  The rest I froze in ice cube trays. 


My projects for the next few days involve canning crushed tomatoes.  I already have them peeled and in the fridge waiting on me.  I also have a peck of peaches in the fridge waiting to be made into jam and maybe a few jars of peaches in syrup.  

We also (finally) took a trip somewhere. We have not been on vacation since moving to the country, and I was dying to go somewhere if only for a day.  We went to Valle Crucis and spent the day browsing antique shops, general stores, and eating at a fabulous restaurant.  I snapped a picture of the flower beds in front of the restaurant.  They have winter squash and melons planted among the flowers.  I just love that! 


Next week, I will pressure can some of our potato harvest.  Some of them are not storage quality, and I will peel them and can them to use in mashed potatoes and soups.  I will also put up 2 bushels of corn, and pressure can a batch of chicken stock.  After that, I hope to be done for a while. 

We had the potatoes on the counter to let the dirt dry a little while we found a large enough washtub to store them in temporarily.

Preserving foods is a lot of work but so worth it.  It makes meal planning and prep so much easier later in the year, and most importantly we know where our foods come from and how they were grown.